Use QuickBooks Time Kiosk photo capture
by Intuit•11• Updated 1 week ago
Learn how to set up and use the QuickBooks Time Kiosk photo capture for QuickBooks Time and QuickBooks Online.
If you have QuickBooks Online Essentials, QuickBooks Online Plus, QuickBooks Online Advanced, QuickBooks Online Accountant, or QuickBooks Workforce Premium or QuickBooks Workforce Elite, you can use the QuickBooks Time Kiosk photo capture there.
Note: To turn on the photo capture feature of Time Kiosk on a device other than Android or iOS, use one of the following browsers:
- Chrome
- Firefox
- Microsoft Edge
Set up Time Kiosk photo capture
- If you haven't already, set up and authorize the kiosk.
- Go to All apps
 , then Time, then Overview (Take me there).
 - Select Manage kiosks.
Note: If you are in QuickBooks Time, go to Feature Add-ons, then Time Kiosk. - Select the kiosk name.
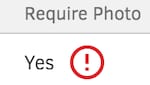
- Select Yes in the Require Photo on Clock In/Out column, then Save.
- On the kiosk device, enter your PIN, sign out, and enter your PIN again.
- A message displays asking for permission to use the device's camera. Follow your device's prompts to grant permission.
View Kiosk photos
- In QuickBooks Online: Go to All apps , then Time, then Time entries (Take me there). or in QuickBooks Time, select Time Entries.
- In QuickBooks Online, in the Time Entries tab, or in QuickBooks Time, in the Timesheets tab, any timesheet with kiosk photos will show one or more small photos.
- Select the photo to expand it, and navigate left or right to view more than one photo.
Troubleshooting
- Chrome 45+
- Firefox 33+
- Microsoft Edge
- If you have not already, set up and authorize the kiosk:
- On a computer, go to Feature Add-ons > Time Clock Kiosk.
- At the left, select the kiosk name.
- In the Edit Kiosk window, under REQUIRE PHOTO ON CLOCK IN/OUT, select Yes > Save.
- On the kiosk device, PIN in, PIN out, and PIN in again.
- A message displays asking for permission to use the device's camera. Follow your device's prompts to grant permission.
- On a computer, select Time Entries.
- In the Timesheets tab, any timesheet with kiosk photos will show one or more small photos.
- Select the photo to expand it, and navigate left or right to view more than one photo.
More like this
- Set up QuickBooks Time Kioskby QuickBooks
- Add and view photos on timesheets in QuickBooks Timeby QuickBooks
- Get more done with QuickBooks mobile app and webby QuickBooks
- Set up and use Photo Sync in QuickBooks Mac Plusby QuickBooks