Create an Email on Android
by Intuit•3• Updated 10 months ago
Wherever your day takes you, Mailchimp's mobile app helps you manage your email campaigns. You can create, edit, and send campaigns from your mobile device. If you need to do something that isn't available in the mobile app, log in to Mailchimp.com from a web browser to access more features.
In this article, you'll learn how to create an email campaign on your mobile device.
Before you start
Here are some things to know before you begin this process.
- To send an email, make sure you have subscribed contacts in your audience. If you don’t have subscribed contacts in your audience, import your contacts or invite people to subscribe with a signup form.
- Be sure to verify your email’s domain before you send your first email.
Create an email Campaign (new builder)
Create an email campaign in the new builder from the Campaigns tab or tap the plus icon to access the option in the Quick Actions menu.
To create an email in the new builder from the Campaigns tab, follow these steps.
- In the Mailchimp mobile app, tap the Campaigns tab.

- On the Campaigns page, tap the plus icon.

- Tap Create an Email (new builder).
- On the Templates screen, swipe to find a template you like then tap Select. All templates show placeholder text and images to help you begin to design your email.
- Enter your campaign details, including Campaign Name, Recipients, Email Subject, From Name, Preview Text and From Email Address.
That's it! You can start adding content and designing your campaign.
Design a campaign
After you choose a template and set up your email, you’ll move to the design step. Use content blocks to add and format text, upload images, and design your background. If you created your draft campaign using the web browser, you can edit it in the mobile app at any time. Find the campaign you want to work with and tap Preview and Edit.
Add Content
Depending on the template you choose, you can add, delete, move, and replicate content blocks to create the look and feel you want.

- Add a content block
Tap the plus icon to choose and insert a new content block. - Upload files or images
Select an image content block, then choose options from the editing toolbar. Tap Choose file. Add a new image from your phone or tablet, or choose a file from the Content Studio. - Preview as you edit
By default, you view and edit the email in Mobile mode. Tap the eye icon to switch between mobile and desktop preview. - Change the background
Tap the paint bucket icon to choose a color for your background and images. You will see the global styles menu.
Edit a content block
To edit an individual content block, tap the block you want to work with. On the toolbar, choose move, edit, duplicate, or delete.

- Move
To change the order of content blocks in your campaign, tap the up/down arrows to shift the block up or down. - Duplicate
To copy a content block, tap the enclosed plus icon. Any content you’ve added to that content block will show in the duplicate block. - Delete
To remove a content block from the campaign, tap the trash icon. - Edit text blocks
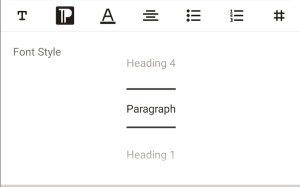
Tap the block you want to edit then use the editing toolbar to change basic text attributes, headers, fonts, colors, button shape, and style. To update or add new text, tap the block twice to reveal the cut, copy, or replace menu. Set your text to bold, italic or underline. Also, select options to re-align your text to left, center, or right.
- Edit image blocks
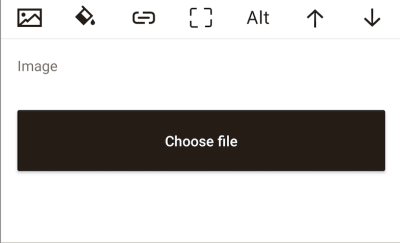
Tap the image block you want to edit then select editing options from the menu. Tap Choose file. Add a new image from your phone or tablet, or choose a file from the Content Studio. Also, add alt text or a link to your image.
You can send a test email to see how your content looks. You can also use the Replicate option to make a copy of your email or delete the campaign entirely.
Send a campaign
Before you send your campaign, you’ll review the checklist for alerts. After any issues are resolved, the campaign is ready to send.
To send an email campaign from your mobile device, follow these steps.
- On the Campaigns screen, tap the campaign you want to work with.
- Tap the Send arrow.

- Review the checklist for your campaign. If there are issues with your campaign, tap the alert to return to your draft and resolve the problem.
- When you’re ready, press Touch and hold to send. Or, to schedule your campaign for another time, tap SCHEDULE FOR LATER.
Create an email campaign (classic builder)
You can create an email campaign in the classic builder from the Campaigns tab or tap the plus_ icon to access the option in the Quick Actions menu.
To create a campaign from the Campaigns tab, follow these steps.
- In the Mailchimp mobile app, tap the Campaigns tab.
- Tap the plus icon.

- Tap Create an Email (classic builder).
- On the template screen, click the top drop-down menu to view your template options:
• Featured Layouts
Premade layouts that you can fill out with your own information.
• Saved Templates
Templates you’ve already made on the desktop version of Mailchimp. - Swipe to find a template that you like and tap Select.

- The from name and from email address fields automatically show your account information. Tap each field to enter the campaign name, recipients, email subject, and preview text.
Design a campaign
After you choose a template and set up your email, you’ll move to the design step. Use content blocks to add and format text, upload images, and design your background. If you created your draft campaign using the web browser, you can edit it in the mobile app at any time. Find the campaign you want to work with and tap PREVIEW and EDIT.
Add content
Depending on the template you choose, you can add, delete, move, and replicate content blocks to create the look and feel you want.
Edit a campaign
Here on the main campaign screen, you can add content blocks, change the background, and see how your campaign will appear on desktop and mobile devices.

- Add a content block
Tap Add to choose and insert a new content block. - Upload files or images
Select an image content block and tap Edit. Tap Replace. Add a new image from your phone or tablet, or choose a file from the Content Studio. - Preview as you edit
By default, you view and edit the email in Desktop mode. Tap Preview to switch between desktop and mobile preview. - Change the background
Tap the Background button in the header, body, and footer to choose a color or insert an image for each section. - Adjust the section height
Slide the icon to adjust the height of the header, body, and footer.
Edit a content block
To edit an individual content block, tap the block you want to work with. On the toolbar, choose move, edit, duplicate, or delete.

- Move
To change the order of content blocks in your campaign, tap Move. Then, use the arrows to shift the block up or down. Edit
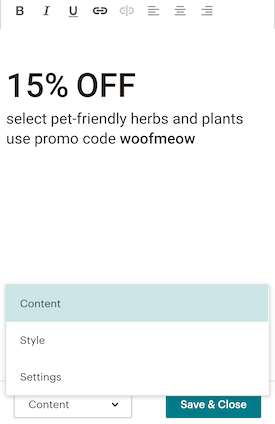
To edit the contents of a block, tap Edit.Edit text blocks To change the font or style of the text, tap the Content drop-down menu in the lower-left corner to navigate between the Style or Settings screens. When you’re done, tap Save & Close.

Edit image blocks
Tap Replace. Add a new image from your phone or tablet, or a choose a file from the content studio. When you’re done, tap Save & Close.
Duplicate
To copy a content block, tap Duplicate. Any content you’ve added to that content block will show in the duplicate block.- Delete
To remove a content block from the campaign, tap Delete.
After you’ve finished editing the campaign, be sure to tap Save & Exit.
Send a campaign
Before you send your campaign, you’ll review the checklist for alerts. After any issues are resolved, the campaign is ready to send.
To send an email campaign from your mobile device, follow these steps.
- On the Campaigns screen, tap the campaign you want to work with.
- Tap the Send arrow.

- Review the checklist for your campaign. If there are issues with your campaign, tap the alert to return to your draft and resolve the problem.
- When you’re ready, press Touch and Hold to Send. Or, to schedule your campaign for another time, tap SCHEDULE FOR LATER.
More like this
- Create an Automated Welcome Email on Mobileby QuickBooks
- Create a Product Retargeting Email on Mobileby QuickBooks
- Create estimates in the mobile appby QuickBooks
- Use Mailchimp on Mobile Devicesby QuickBooks


