Image Alt Text
Innovation

My top 3 QuickBooks Enterprise report features

One of the biggest benefits to using QuickBooks® Enterprise is its robust reporting capability . This an area where QuickBooks’ applications shine, with numerous reporting options available in all three desktop product editions: QuickBooks Pro, QuickBooks Premier, and QuickBooks Enterprise. Reporting options and capabilities increase with QuickBooks Enterprise, the most powerful desktop platform.

QuickBooks users should be pleased with the customization and ability to export any report to Microsoft Excel for further customization, if desired. Let’s talk about some of the most common features used in QuickBooks reporting: commenting on reports, report customization options, and scheduling reports.

Commenting on reports

This feature, which allows you make reports easier to understand by giving you fields to capture report questions or make general comments, is by far my favorite Enterprise reporting feature! This capability allows the accounting professional the ease of communication and sharing insights with their client or even internally within the accounting department. Annotated reports can be saved, printed and emailed. No more lengthy emails with questions and attached reports. Instead, the comments are stored on the saved report that can be emailed.

Access this from the Comment box at the top of a displayed report. Saved reports with comments can be accessed from the menu bar by selecting Reports, Commented Reports, or also from the Reports, Process Multiple Reports menu.

Image Alt Text

To print a commented report or save it as a PDF, open the report, then click the “Print” button in the toolbar at the top of the report. To print the report, click the “Report” command from the drop-down that appears, then print the report using the “Print Reports” dialog box. To save the report as a PDF file, instead, select the “Save as PDF” command from the drop-down menu. Then save the report as a PDF using the “Save as PDF” dialog box.

To email the report, click the “E-mail” button in the report toolbar. Then select the “Send report as PDF” command from the drop-down menu that appears. You can click the “X” in the upper-right corner of the report to close it when you are finished.

To view saved commented reports, select “Reports | Commented Reports” from the Menu Bar to view the “Commented Reports” list. You can select a report within this list and then click either the “Display…,” “Print…,” or “Email…” buttons at the bottom of the list to show, print, or email the selected report.

To rename a report in the list, click the report to rename to select it, then click the “Commented Reports” button in the lower-left corner of the list. Choose the “Edit Commented Report” command from the pop-up menu that appears. Type the new name for the report into the “Name” field of the “Save Your Commented Report” dialog box, then click the “OK” button.

To delete a commented report, click the report in the list to delete to select it, then click the “Commented Report” button in the lower-left corner of the list. Select the “Delete Commented Report” command. Click the “Yes” button in the “Delete This Commented Report?” dialog box that appears to permanently delete the report. To close the “Commented Reports” list, click the “X” in its upper-right corner.

Report customization options

QuickBooks Desktop reports can easily be created, with customization options available to change the date ranges, accrual, or cash basis reporting, and the option to choose from a variety of filters. You can add headers or footers to any report, add or hide columns, and choose from standard or detailed reports. All QuickBooks reports offer the following reporting options, which can be found at the top of the report screen.

Image Alt Text

Customize Report: This option allows you to choose various report filters, add or change a header or footer, and change fonts. You can also choose report date ranges, select the report basis (cash or accrual), and choose which columns or rows you wish to display. There is also an option to add sub-columns if you desire.

Some of the filtering options available include the following:

  • Transaction type (including posting and non-posting transactions)
  • Account
  • Distribution account
  • Name
  • Customer
  • Vendor
  • Employee
  • Product/Service
  • Location
  • Class
  • Payment Method
  • Terms

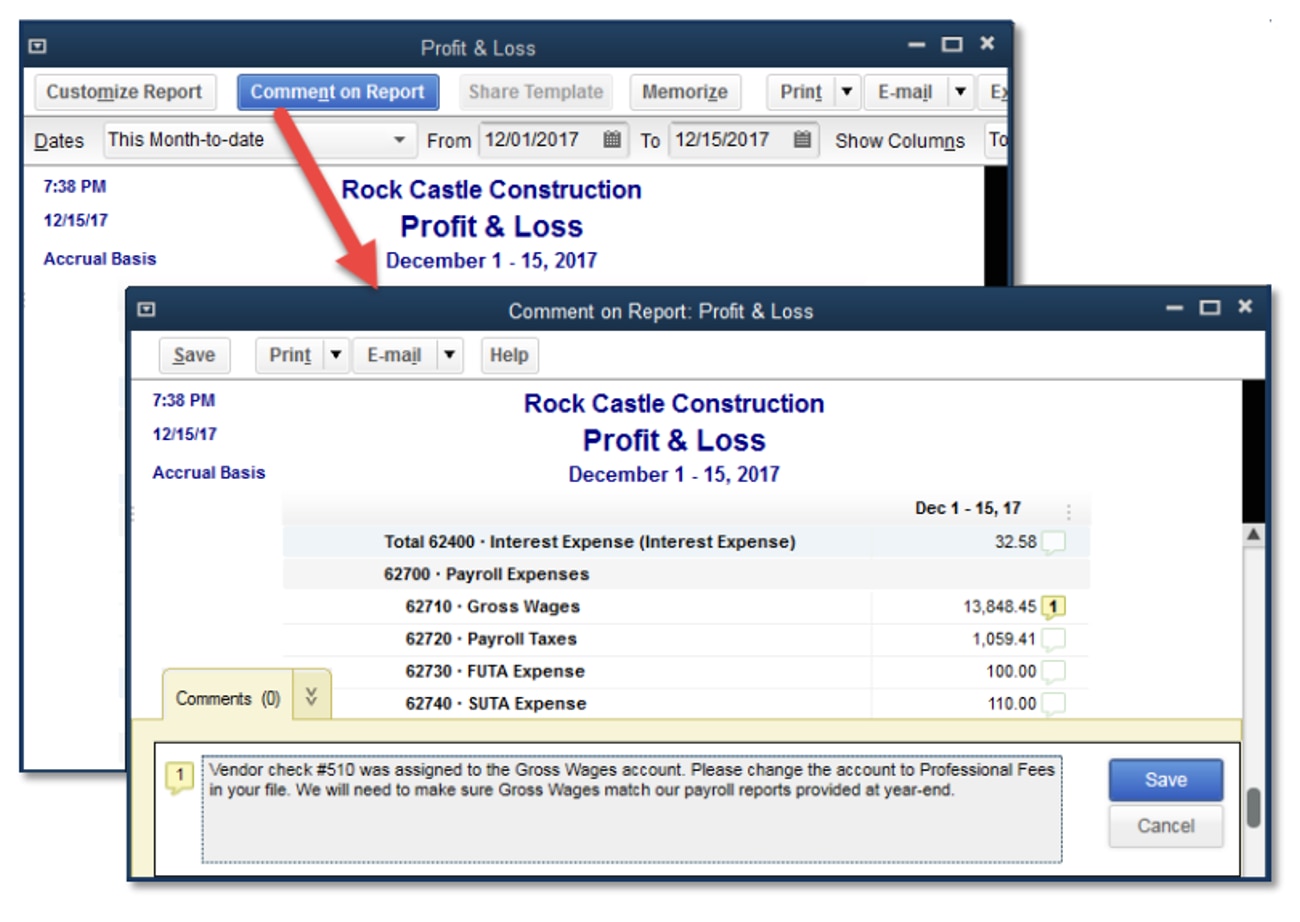
Comment on Report: This is a great feature that allows you to put a personal note on any report, great when distributing select reports to others.

Memorize: You can memorize any report using the Memorize option, which also allows you to share the template with others. Once a report is memorized, it can be scheduled to run at a future date, which we’ll discuss later in this article.

Print, E-Mail, and Excel: You have the option to print any report, email the report to recipients, or export the report to Excel for further customization if desired.

Hide Headers: You have the option of removing the header of the report for viewing or printing.

Collapse Rows: When you “Collapse (all) Columns,” the button changes dynamically to “Expand Columns,” allowing you to set all the columns back to their normal state. Simply click the Expand Columns button and all your report columns will once again be displayed (as shown below). When the report is collapsed, you will see all amounts rolled up to the parent account. If you expand, you will now see parent and sub-accounts.

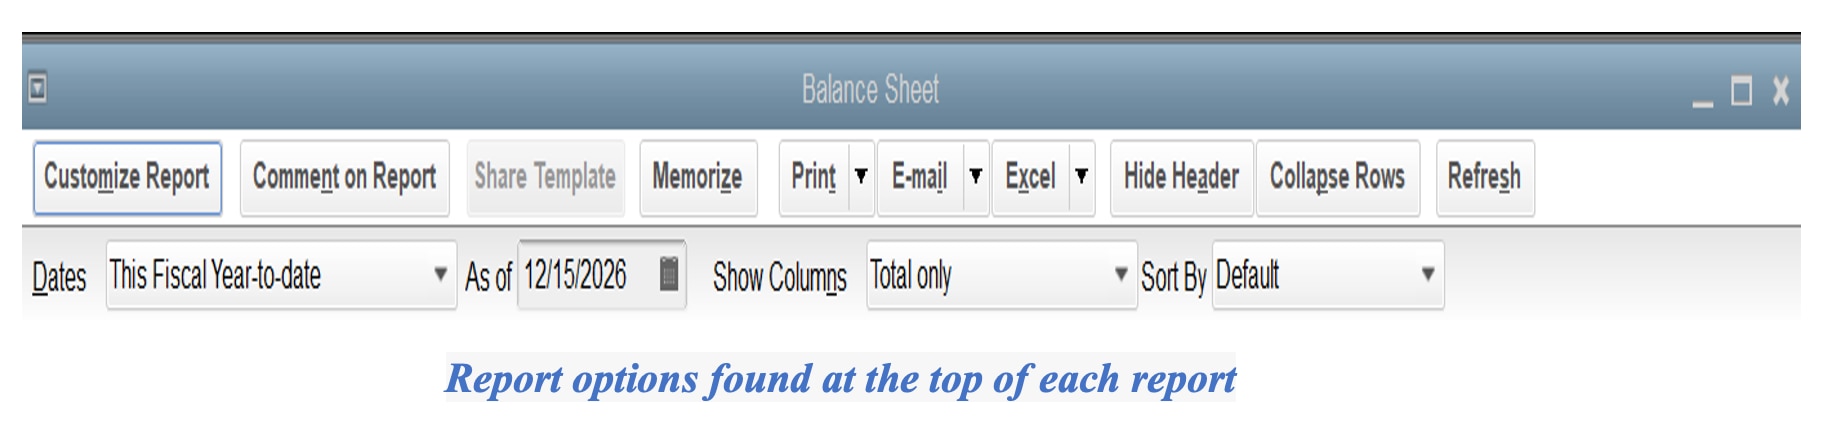
Basic report parameters can usually be set directly from this page without the need to access the Customize tab.

Scheduling reports

One of the most convenient features found in QuickBooks Enterprise is the ability to schedule reports to run at chosen intervals and be automatically sent to a predetermined group. To get started creating a schedule for your reports, access the Report Schedule Setup option found under the drop-down menu of Reports.

Image Alt Text

Once you choose which reports you wish to schedule, you will need to name the schedule and choose its frequency. Next, choose the start date and time, then enter the emails of all report recipients. If you run and distribute reports on a regular basis, this feature will save you a ton of time. Automating this process ensures that everyone sees the information needed to make business decisions based upon current information and financials.

QuickBooks Enterprise is designed to make a business’ life easier, especially when it comes to reporting. As always, check with your accountant to ensure you’re using all of the available features in QuickBooks Enterprise. Good luck!


Related Articles

Mail icon
Get the latest to your inbox
No Thanks

Get the latest to your inbox

Relevant resources to help start, run, and grow your business.

By clicking “Submit,” you agree to permit Intuit to contact you regarding QuickBooks and have read and acknowledge our Privacy Statement.

Thanks for subscribing.

Fresh business resources are headed your way!

Looking for something else?

QuickBooks

From big jobs to small tasks, we've got your business covered.

Firm of the Future

Topical articles and news from top pros and Intuit product experts.

QuickBooks Support

Get help with QuickBooks. Find articles, video tutorials, and more.