How to Customize Invoices in QuickBooks Online


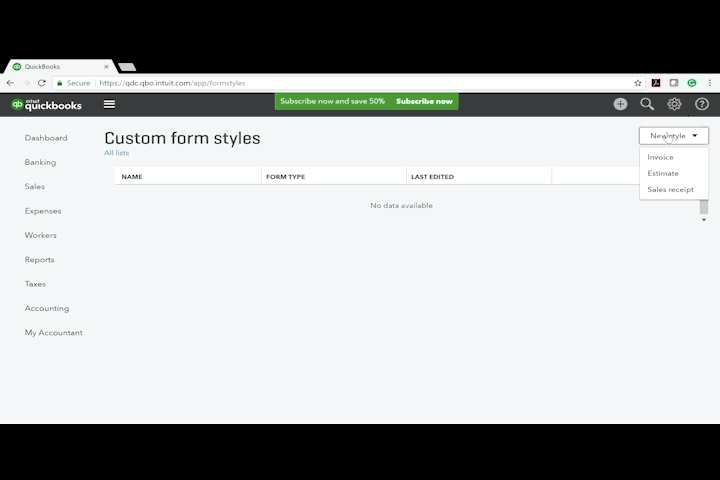
 ) and then select Custom Form Styles. From the Custom Form Styles dashboard, you can manage and edit templates for Invoices, Estimates, and Sales Receipts.
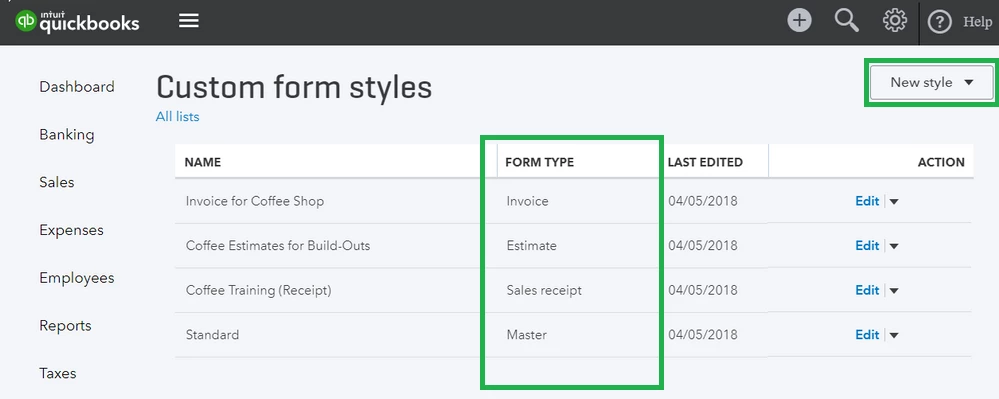

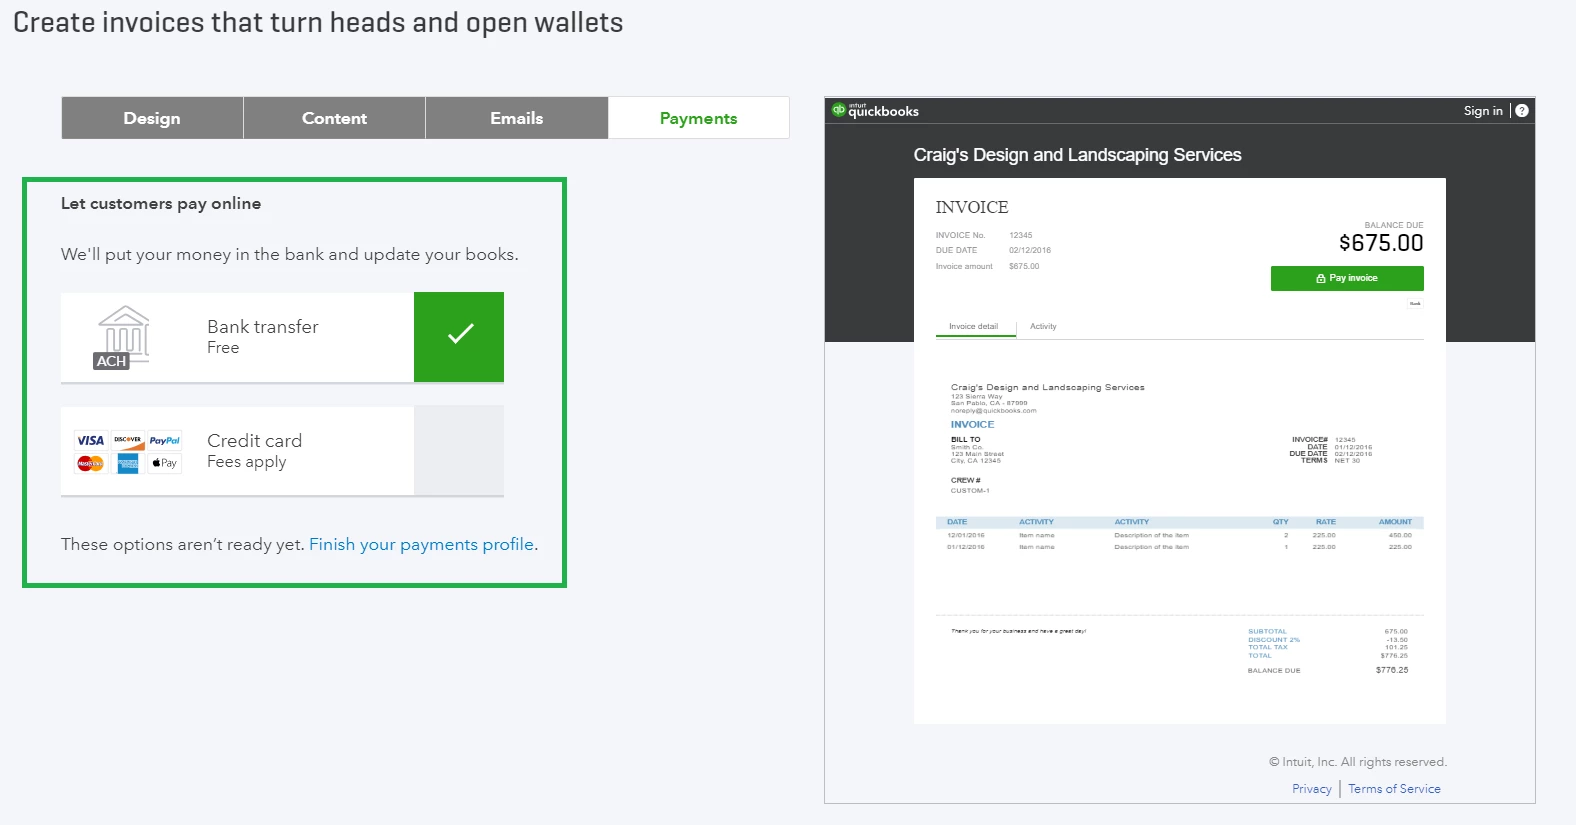
When you’re done editing the template, you can click Preview PDF or Save and Exit to return to the Custom Form Styles dashboard.
The first invoice template you create will become your master default template. To change the default form, click the Arrow Icon ( ) next to the form you want to designate and select “Make Default."
Designing Custom Invoice Templates
When designing your invoice, ask yourself the following:
- Appearance – Do you want your brand to appear everywhere on your invoices, or do you prefer a more subtle approach? Try to match your existing marketing efforts to create a sense of uniformity.
- Data-fields – What information matters most to your customers? How much information is too much? Do you provide clients with specific units of measurement? How about tracking information, like drivers’ names, to add peace of mind? These can always be updated later on.
- Format – Are your invoices easy to read? Where does the most important information appear on your forms? Which data fields are absolutely necessary? Do your customers prefer larger fonts for improved readability? Start with the basics, then add icing to the cake.
- Personality and Tone – Is being approachable important to your business? Do you want to sound casual or official? Design accordingly.
Creating a custom logo
When you first create your QuickBooks Online company file, you can add your business logo. This same logo will appear on all of your invoices and sales forms, so take pride in its design and presentation.
Logo edits should be made outside the program before uploading the image. Note that square and circular logos with white backgrounds tend to look the best on invoices. Logos files have a few technical requirements:
- Must be one of the following formats: .gif, .bmp, .jpg, .jpe, or .jpeg
- Be smaller than 1MB (this helps with loading speed)
- Have a bit-depth (aka color-depth) of 24-bits or less and use standard sRGB
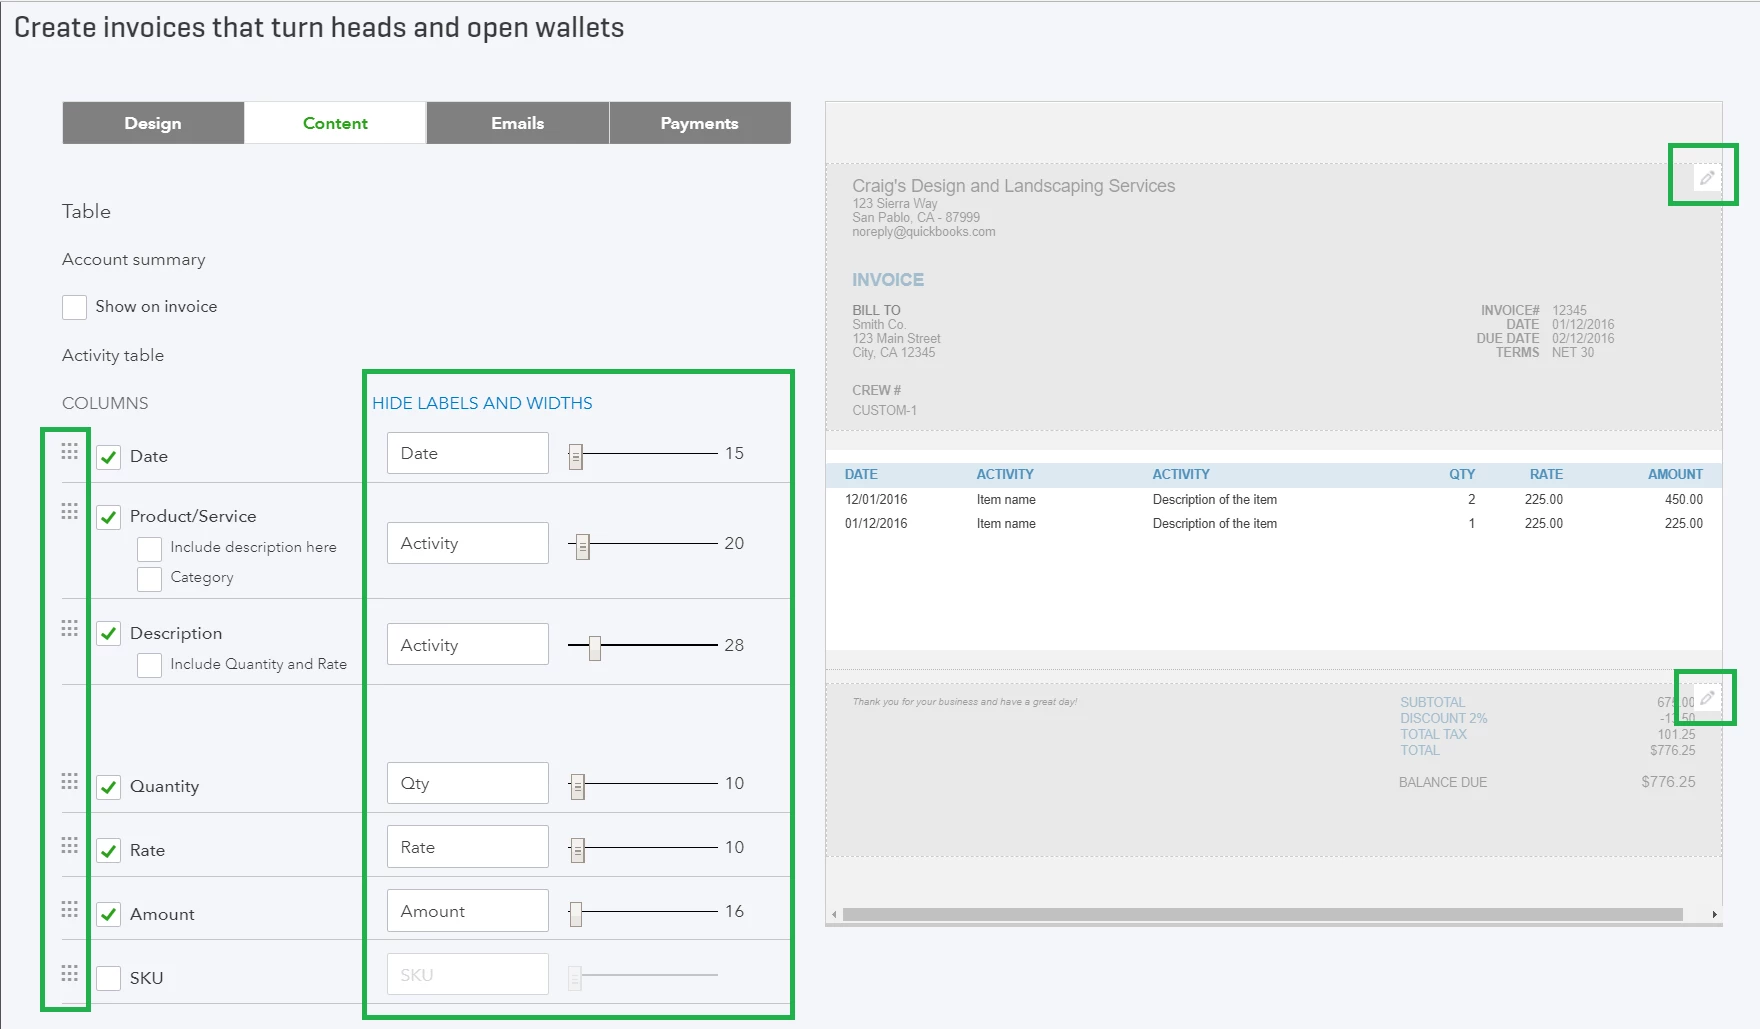
Customizing data fields
You can add, remove, or rename certain data fields from the Content Tab. To edit a section, click on the pencil icon ( ) on the preview form. Each section has its own set of customization features.
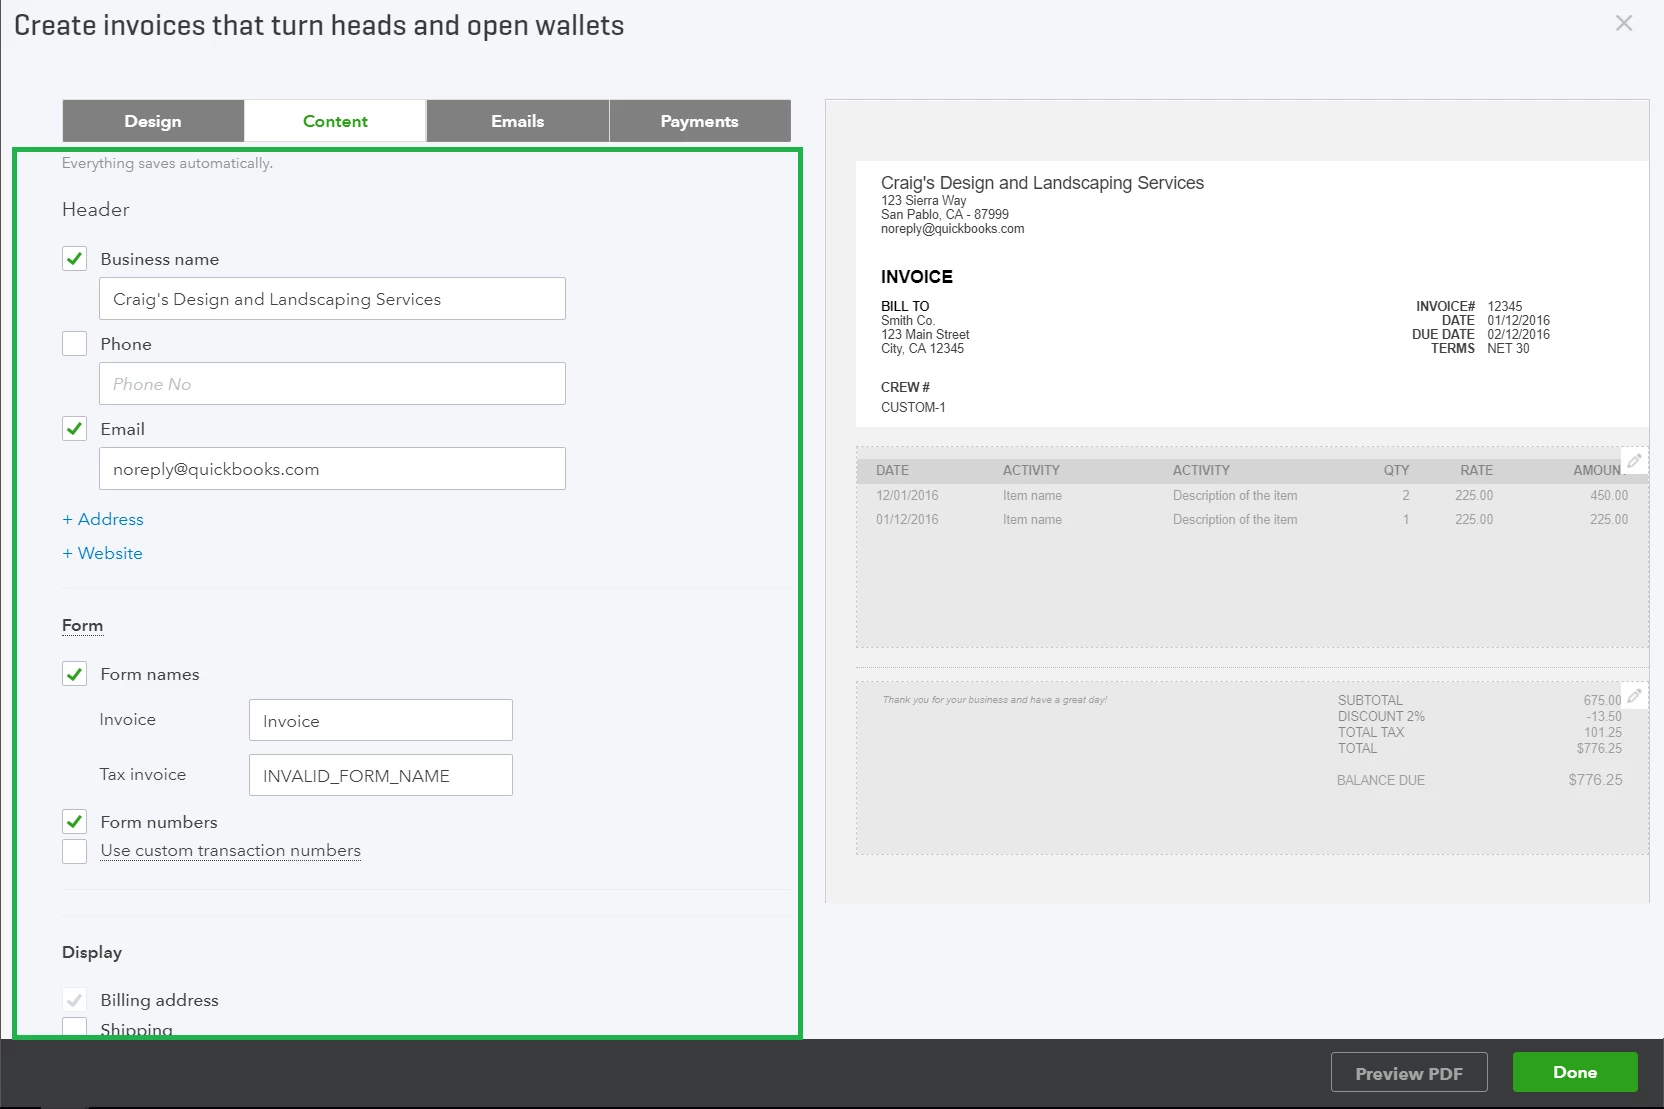
There are numerous available customization options. We won’t go over everything, but we will highlight a few important areas:
- In the “Header” section (top section), you can add up to three custom fields by clicking “+ Custom Field”
- In the data table section (middle section), you can edit, remove, or rearrange the item description, quantity, and rate data fields.
Click the blue “Edit Labels and Widths” title at the top to enable the column and data field editor. There’s underlying flexibility in this particular module – for instance, if you prefer to display unit quantities in “lbs,” “grams,” or “boxes,” simply enter the unit of measure into the text box.

- To change the order of the columns, grab the square icon and drag it until the solid line becomes dotted.
- Use the slider bar to adjust the width of each column. Column width is relative and finite – you may need to narrow columns that are taking up space before you can adjust others.
The “Products/service” line in the data table section includes item categories by default. You can turn these off, but product categories provide customers with more information and you get better data (learn more about item categories – Introduction to Categories in Products and Services).
Any other tips I should keep in mind to be successful?
- Let your invoices portray you and your brand in the best light. Treat them you would any other type of communication, be it email, phone call, or face-to-face meeting. Keep them simple but impactful.
What’s Next?
- How to Adjust Invoice Payment Terms in QuickBooks Online
- How to Review Open Invoices and Send Payment Reminders and Balance forward Statements in QuickBooks ...
- How to Send Paper Invoices in QuickBooks Online
Check your Progress

