Why is the accounts payable process important?
The accounts payable process plays an important role in your business’s accounting operations for several reasons. Let's dive into a few benefits of having a clear and consistent AP process.
Helps manage cash flow
Your AP process dictates when money leaves your business. When your business consistently records and tracks invoices, you have a much clearer view of upcoming payments and short-term obligations. This ultimately makes it easier to plan payments strategically instead of scrambling at the last minute.
A structured process allows you to:
- Schedule payments based on the exact due date
- Anticipate your near-term cash needs accurately
- Maximize working capital by timing payments strategically
Supports accurate financial reporting
Every recorded invoice feeds directly into your expense and liability accounts. Following consistent procedures for coding and recording helps you generate financial statements that accurately reflect your business's true spending and debt. This makes your life easier when you need to review your spending habits or questions during tax season or an audit.
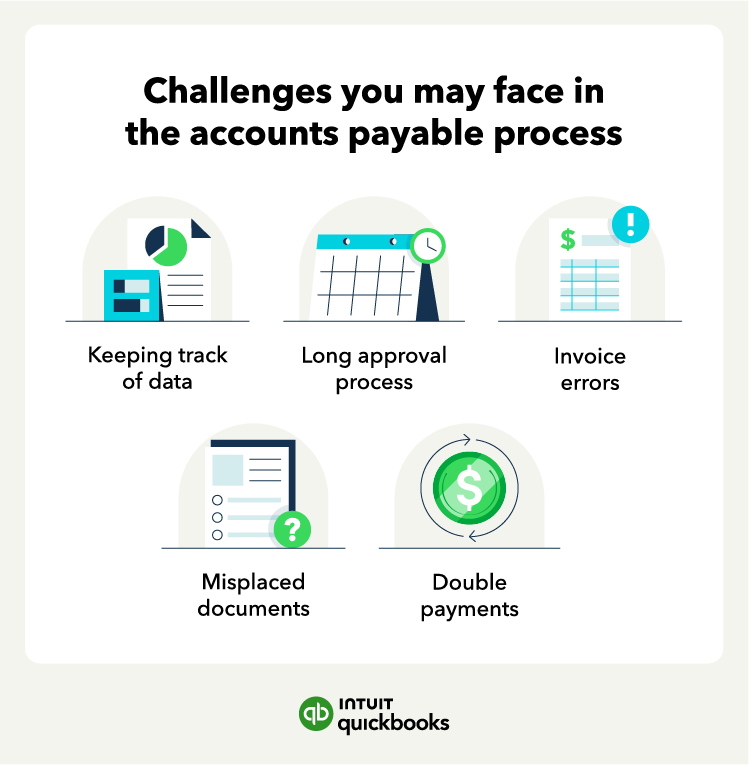
Reduces financial risk
Without a defined process, invoices can easily be forgotten, paid incorrectly, or even paid twice. Establishing clear review and approval steps adds structure and makes it easier to catch potential issues before the money leaves your bank account.
A clear AP process helps you reduce the risk of:
- Accounting errors like duplicate or incorrect payments
- Missed invoices leading to late fees
- Errors in expense recording and tax compliance
Strengthens vendor relationships
Your vendors rely on timely payments, and your organized AP process is what delivers on that promise. When your system is reliable, it's easy to pay invoices on schedule and quickly address questions if something doesn’t look right.
Consistent payment practices support stronger vendor relationship management and can lead to favorable outcomes, like better contract terms.
Creates reliable historical records
Every invoice and payment becomes a permanent part of your business’s financial history. Keeping accurate AP records gives you a clear audit trail to reference when reviewing:
- Past spending
- Resolving discrepancies
- Responding to tax requests
Having this information organized in one place makes it easier to respond confidently when questions come up.