Hello, Hypomusk.
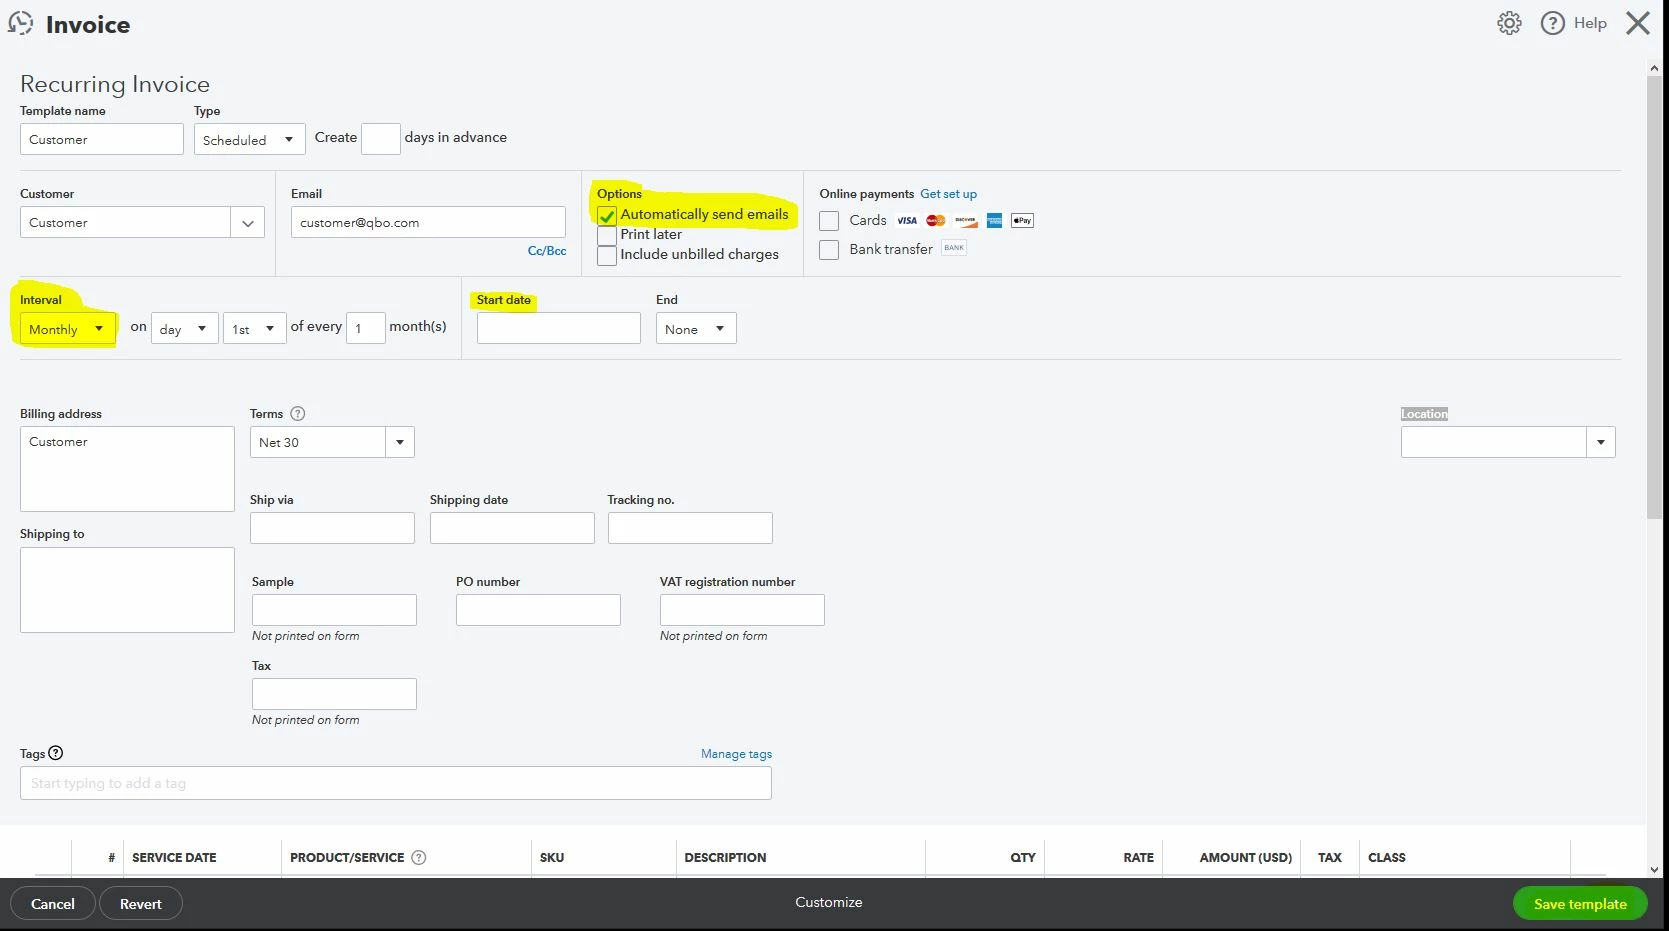
Thank you for reaching out to the Community. We can create a recurring invoice in QuickBooks Online. You can modify the interval and start date so that it will send on the specific month you'd like and mark check the Automatically send emails so the system will follow the command after it has been created.
Here's how:
- Go to Settings and then Recurring transactions.
- From the Action column, select Edit for the transaction you want to modify.
- Under option mark check the Automatically send emails.
- Input the Interval and the Start date.
- Press Save template.
I've included this article about the process: Create recurring transactions in QuickBooks Online. This also contains sub-articles that will help you with your future tasks such as troubleshooting and managing recurring transactions.
That's it! You should now be able to use the template you need.
Don't hesitate to let me know if you have other questions in mind. I'd be around. Stay safe!